The Tomb of Sargeras is a (partially) non-linear raid, and the fourth raid in the Legion expansion pack. There are nine bosses which must be cleared in each of the four dungeon wings. In the PvE progression, this is a 20th tier raid. You can raid on three different difficulty settings (Normal Mode, Heroic Mode and Mythic Mode), with Mythic Mode being the most brutal of the three. It’s good to decide in advance, as you will need to adjust strategy and loot/reward expectation accordingly.
Story
The bosses all come from the ancient Temple of the Moon/Temple of Elune in Val’Sharah. It’s the very same temple where Aegwynn locked up the Avatar of Argeras, which is about ot wake up. The temple is full of night flowers, and demons. Especially demons, so you can guess what to expect – aside from the demons, you will face leviathans, night elves, and tormented souls, and other monsters. As you progress, you can also unlock four new achievements: Abyss Worm, Micronax controller, Fighting with Style, The Darkener, and the Glory of the Tomb Raider.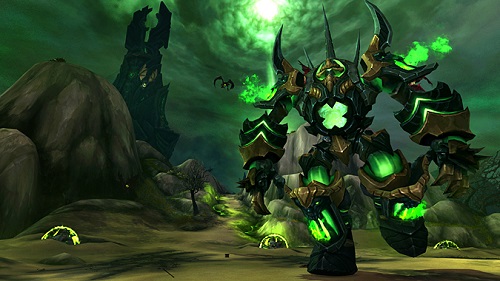
Getting to the Raid
You will find the tomb in the northern region of the Broken Shore. Depending on your abilities, you can fly there, or take a flight path. Prepare for some random demon encounters as you travel: you’ll get NPC assistance in the skirmishes. Either past Wrynnfall, the green circle (the green entrance portal) you will see marked on your map, or pick up a flight path to Vengeance point, bear bear south on the bridge and then take the road on your left.
Once you’re there you will see a summoning stone to the left of the green portal.
Rewards
As usual, this instance comes packed with some very worthwhile rewards – if you survive. More rewards will probably crop up as people begin raiding. Eight of the bosses carry the same level loot (900 for Normal, 915 for Heroic and 930 for Mythic), until the last Boss-Fight (Kil’jaeden), which will drop loot that’s ten levels higher (910 Normal, 925 Heroic, and 940 for Mythic).
Once you’ve unlocked Glory of the Tomb Raider, you get Micronax Controller and the Tomb Raider. If you defeat Mistress Sassz’ine, you get the Abyss Worm. If you manage to kill Kil’jaen on Heroic difficulty, you will receive one of the tints for Fighting with Style: Challenging. He will also drop The Darkener, if defeated on Mythic, and Glyph of Ember Shards for Scribes. The Maiden of Vigilance sometimes drops Hammer of Vigilance, so keep a look out for it.
It might be worthwhile to check some real-time stat guides for the loot before you raid, so you know exactly what you’ll be getting.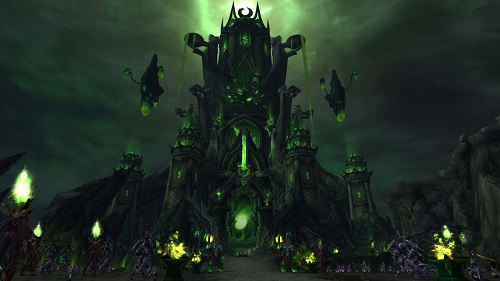
Play-through order
Obviously, the linear elements of the raid are fixed: You start with Goroth and end with Kil’jaeden. But there are some interchangeable quests in the middle: 1. Goroth (fixed) – once he’s been done for, the game unlocks three different bosses, played in any order, before facing the final fights of the raid. 2. Harjatan and Mistress Sassz’ine OR Demonic Inquisition OR Sisters of the Moon, Desolate Host, Maiden of Vigilance and Fallen Avatar 3. Kiljaeden (Biggest loot drop)
Bosses
Goroth - Your first challenge – he exists in a state of eternal torment covered in angry wounds that will never heal, for which he will make you suffer. Strategy: Tank and taunt-swap the green circle and hide behind the Pillars of Eternal Burning (be careful not to destroy these). The big arrows must reach the pillars and the green circles must be kept away.
Harjatan - A naga conqueror known for his viciousness and once worshipped as a god. He’s never forgotten the taste of power or blood, so look out for his Unchecked Rage – both tank and raid must stack in order to absorb when all hell breaks loose. Use a “tank and spank” strategy here, and tank swap to keep stacks low. Be sure to sustain self-healing, as you will take constant damage. You must defeat him to unlock Mistress Sassz'ine.
Mistress Sassz'ine – Will summon different kinds of oceanic leviathan monsters to help her deal out death to any challengers. You’ll need to tank at debuff here and taunt to reduce the damage dealt to the rest of the party. This is a three-phase fight: in the first phase, avoid the tornadoes by hiding behind the puddles, and beware the jellyfish circles, which will stun. For the next, collect the purple puffs and feed to the giant shark, but be careful not to get sucked into its jaws. Avoid the waves. For the final attack, she combines all her abilities, so be prepared.
Demonic Inquisition – Belac and Atrigan have been summoned specifically to defeat any intruders before they can activate the Pillars that will open up the way into the deeper dungeons. You’ll find them in the Wailings Halls, where they’ll be on high alert. Strategy: you can’t tank Belac, so interrupt/distract him and tank Atrigan instead. The bosses share health. Don’t hit Belac while is surrounded by flame or Atrigan while he whirls. When you reach a high Torment level, taunt swap toactivate Confess and clear the Torment in the confession room.
Sisters of the Moon – Once a huntress, Priestess of the Moon and Ranger, they are the spirits of former temple guardians, who have gone mad from millennia bound to their duty. They kill anyone on sight. You get a phase for each, in a single-target fight. Strategy: avoid getting caught in the Twilight Volley circles, and beware the bouncing effect of the Moon Glaives. Phase 3 unleashes everything at once.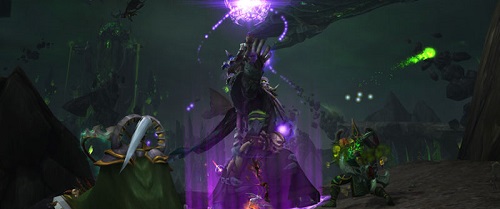
Maiden of Vigilance – This giant construct was once a servant of Aegwynn charged with keeping the Tomb from every opening again. Now it has been corrupted with the avatar’s evil. The maiden commands Fel and Hold magic, so beware her attacks. Strategy: when hit with Light infusion, or Fel infusion, keep clear of players who’ve been hit with the opposite, or you will explode (if this happens, jump into a chasm just before the explosion, and you will be thrown back out again). In phase two, only touch the orbs that are your buff, so either only Fel or only Holy. Melee her until you have exploded her shield.
The Desolate Host – Unlocked after Sisters of the Moon. Once a sacred burial grounds of the Night Elves, now tainted by the malignance of the Legion, it produced the Engine of Souls which corrupts and awaken the sleeping dead, so that they feast on any intruders. Strategy: Gameplay is on two planes with shared boss health: the physical (the Engine) and the spirit (Soul Queen Dejahna), so keep players in both. Tank the engine, and beware Dejahna’s shadow damage. This one is tough – don’t go into it early.
Fallen Avatar – Your second-last challenge: you meet the Avatar itself. The re-animated armour is now under the control of Kil’jaeden, and you’re in for a 2-phase battle. Strategy: First, the Avatar will be locked in place as it regains power: it will sic all near-by constructs on you while it regenerates. Avoid the purple Shadow Blades, which fly randomly. Use the Maiden of Valor to keep the Avatar from regenerating by blocking the Corrupted Matrix (a series of yellow beams coming off the Avatar), then tank swap at 2 damage. Don’t forget to kill the Maiden before you move to phase 2. Run away when the Avatar casts Rupture Realities to take less damage, before return into melee tank from the platform edges. When it hits full energy, it will throw the party into the Fel below and fight at full strength.
Kil'jaeden - This your Big Bad encounter – Kil’jaeden is one angry demon lord: his plans were shot to pieces when you dismantled his Bosses. Now, you get to take him and you’ll need some very intricate strategy to win, as it will be a 5-phase fight (3 phases and 2 intermissions). Strategy: this is mostly a single-target fight. When he initiates Rupturing Singularity, don’t get too close too the purple globe, or you will be knocked of the platform. Everyone except the tank should move into the orange circle when Kil’Jaeden casts Armageddon Hail . During Armageddon, the big circles will explode if not soaked. Beware the obelisks and the terror rift.
As always, avoid all the things that can kill you, listen to your raid leader and have a blast!